
In today’s world, data is being generated at an exponential rate, so much so that analysts are predicting our global data creation to increase 10x by 2025. Businesses are now collecting data across every internal system and external source that impacts their company; and with it comes an ever-growing need to analyze the data to gain insight into how it can be used to improve and enhance their business decisions. Apache Zeppelin, an open source data analytics and visualization platform, can take us a long way toward meeting that goal.
In this article, you’ll learn how to add a custom interpreter for MongoDB and MySQL and how to use it to query and visualize collection data. First, let’s start off with an overview of Apache Zeppelin and it’s feature set:
What is Apache Zeppelin?
Apache Zeppelin is an open-source, web-based “notebook” that enables interactive data analytics and collaborative documents. The notebook is integrated with distributed, general-purpose data processing systems such as Apache Spark (large-scale data processing), Apache Flink (stream processing framework), and many others. Apache Zeppelin allows you to make beautiful, data-driven, interactive documents with SQL, Scala, R, or Python right in your browser.
Apache Zeppelin Features
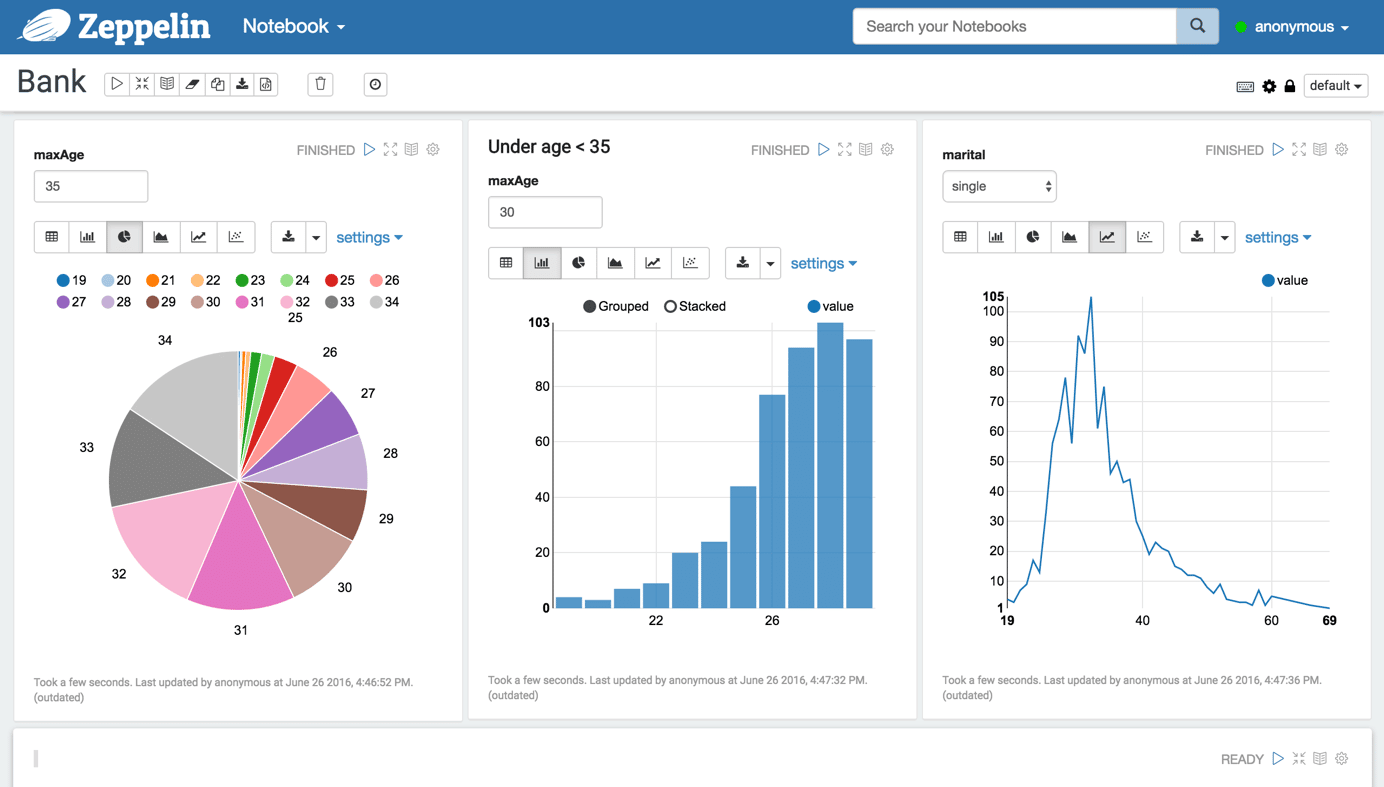
Interactive InterfaceApache Zeppelin has an interactive interface that allows you to instantly see the results of your analytics and have an immediate connection with your creation: |
 |
|---|---|
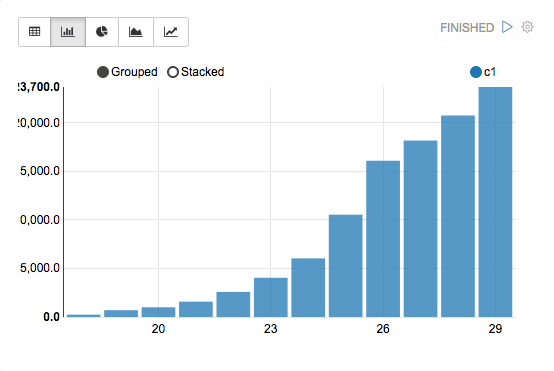
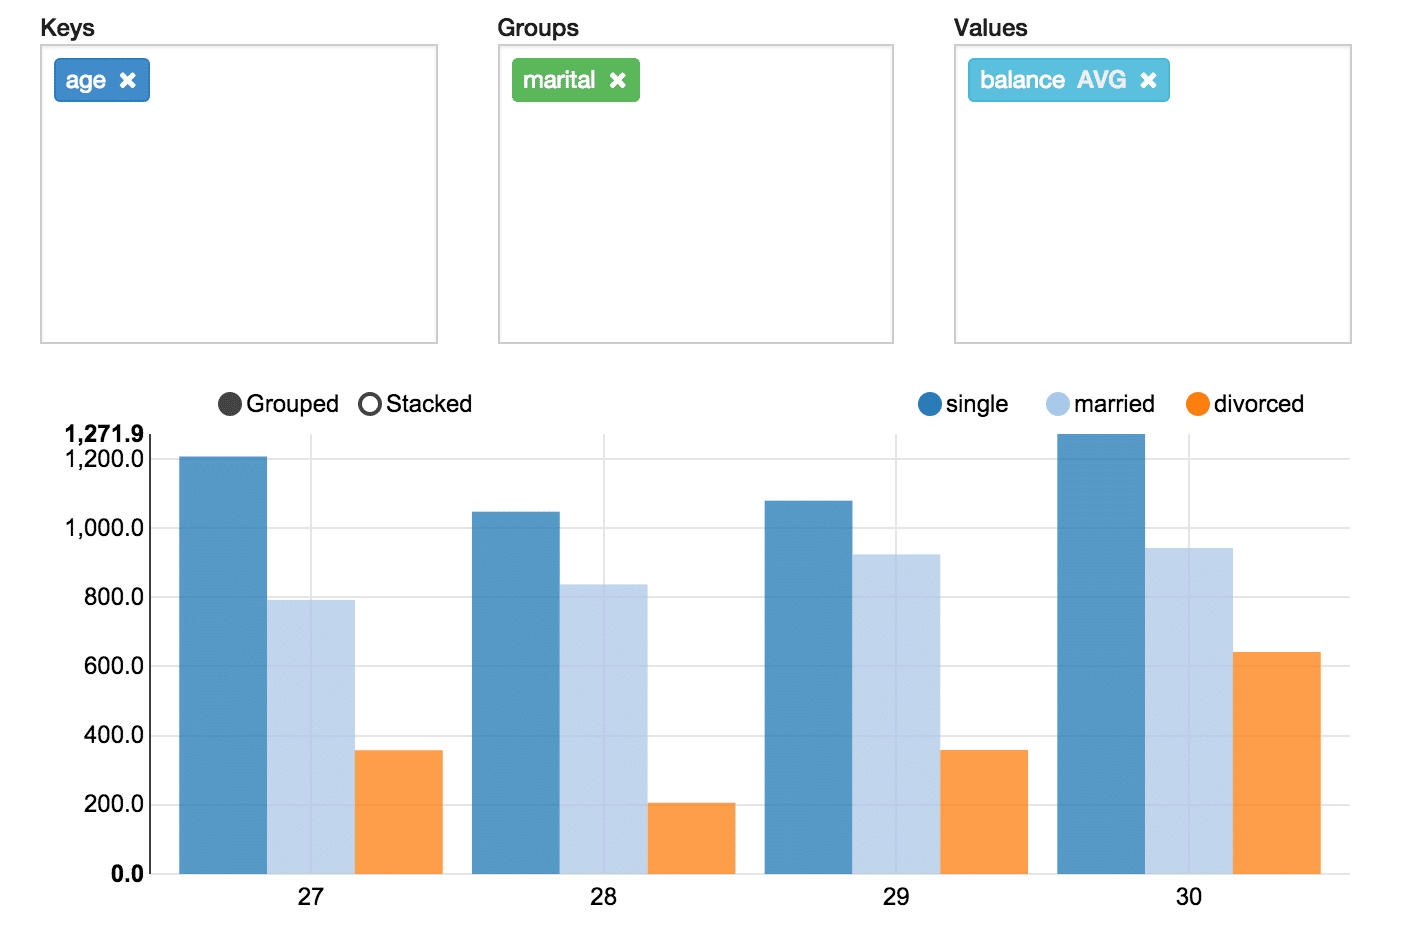
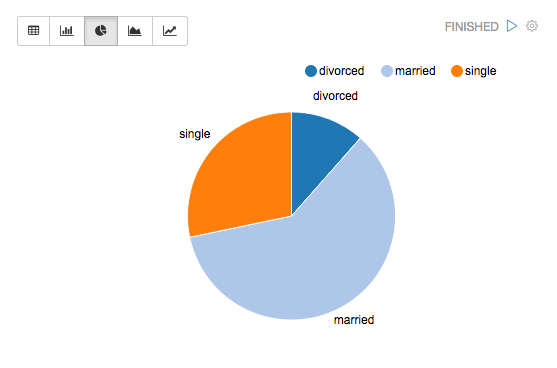
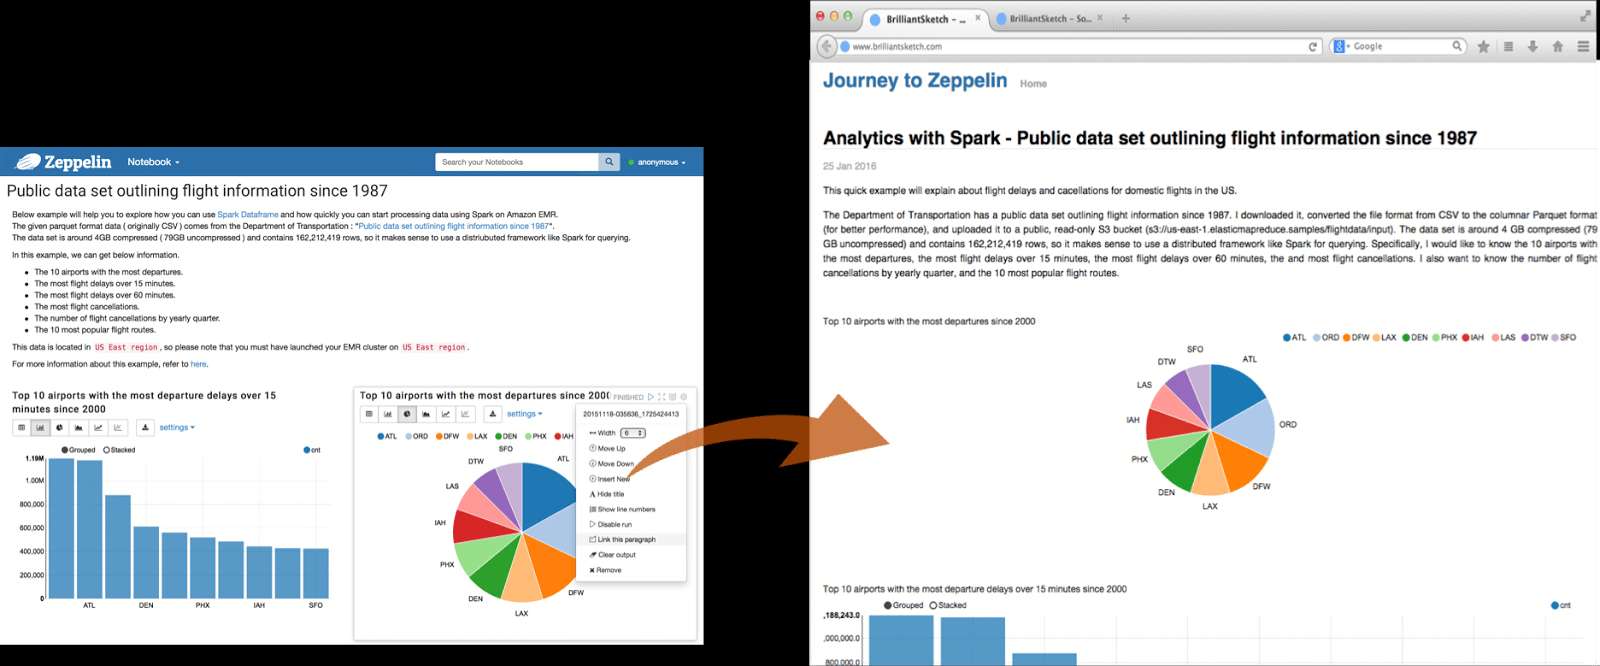
Browser NotebooksCreate notebooks that run in your browser (both on your machine and remotely) and experiment with different types of charts for to explore your data sets: |
 |
IntegrationsIntegrate with many different open source, big data tools such as Apache projects Spark, Flink, Hive, Ignite, Lens and Tajo. |
 |
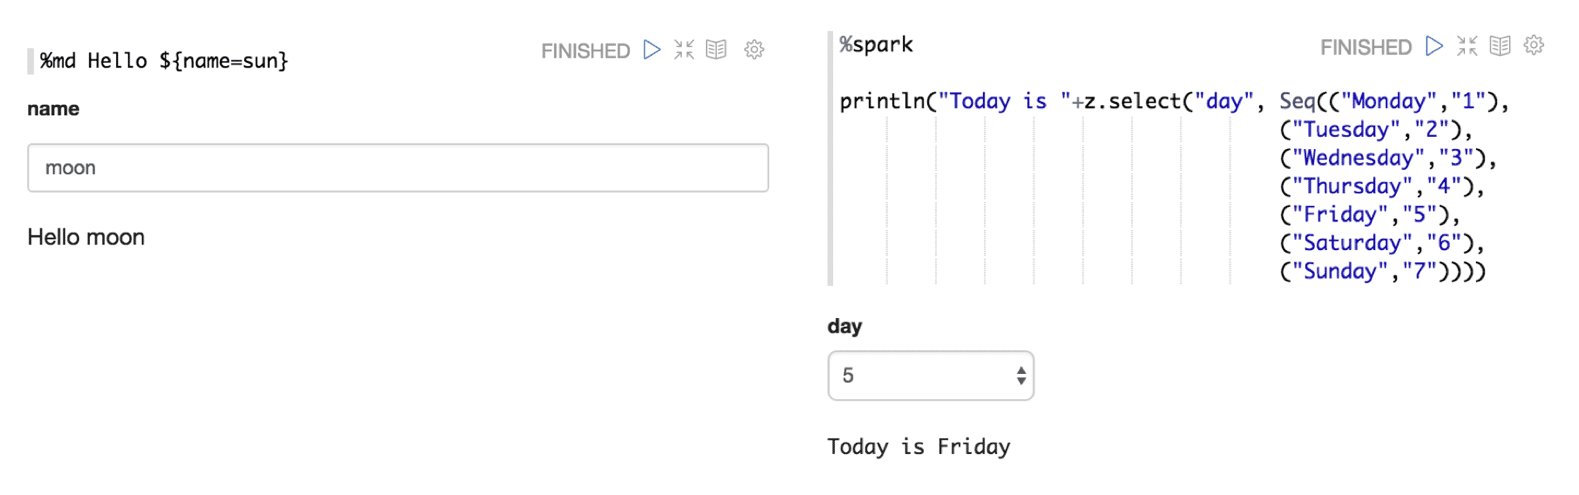
Dynamic Forms
Dynamically create input forms right in your notebook.
Collaboration & Sharing
A diverse and vibrant developer community gives you access to new data sources that are being constantly added and distributed through their open source Apache 2.0 license.
InterpreterApache Zeppelin interpreter concept allows any language/data-processing-backend to be plugged into Zeppelin. Currently, Apache Zeppelin supports many interpreters such as Apache Spark, Python, JDBC, Markdown, and Shell. |
 |
|---|
Now, let’s get started creating your custom interpreter for MongoDB and MySQL.
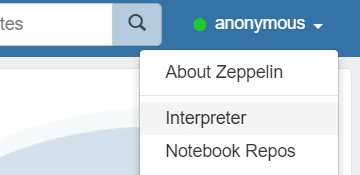
Add a MySQL InterpreterIn the Apache Zeppelin platform, go to the drop-down menu in the top-right and click on Interpreter: |
 |
|---|
Here’s where you can find a list of all interpreters. We need to create a new one for MySQL, so click on the “Create” button in the upper right-hand corner:

|
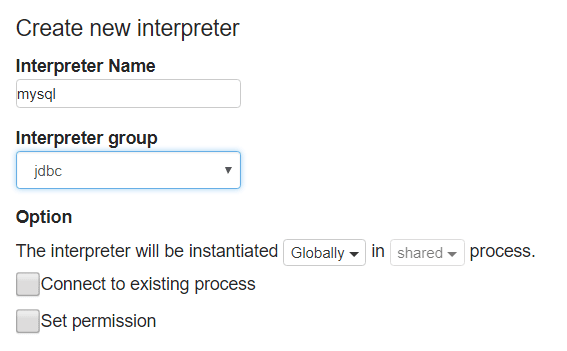
Enter a recognizable name for the interpreter (e.g. mysql), and choose group as JDBC: Keep all the default options, but enter the required details and make sure that a connection to your MySQL server is established: |
 |
|---|
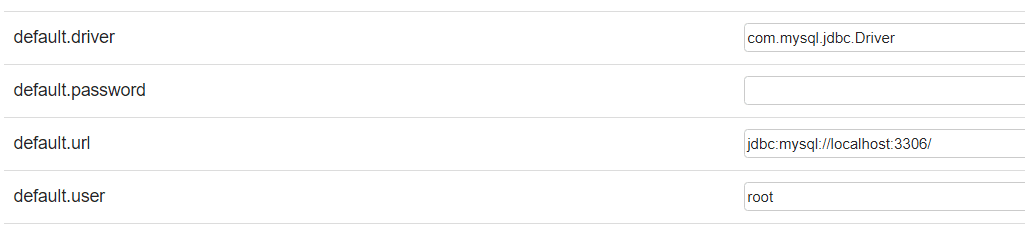
We also need to add a custom artifact to the MySQL connector JAR so Zeppelin knows where to execute it from. Download the connector here, place it in the interpreter/jdbc folder and then provide the exact path to the artifact:

And that’s it! To test our interpreter, we need to create a new note. But first, lets set up our MongoDB interpreter as well.
Add a MongoDB Interpreter
Go back to your Interpreter page and click the “Create” button. We’re going to use this open source MongoDB interpreter, so you’ll next need to download the .zip file and rename it to .jar.
After that, go to interpreters/, create a mongodb/ folder, and paste the .jar into the folder.

|
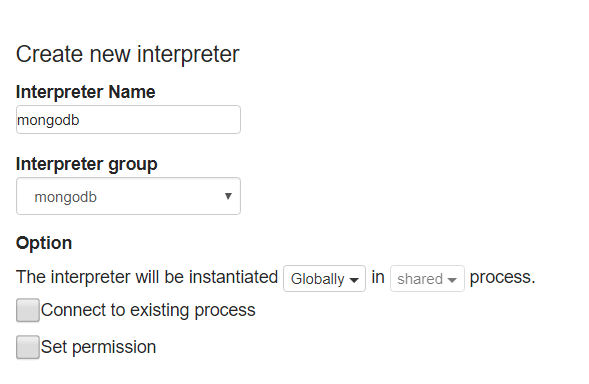
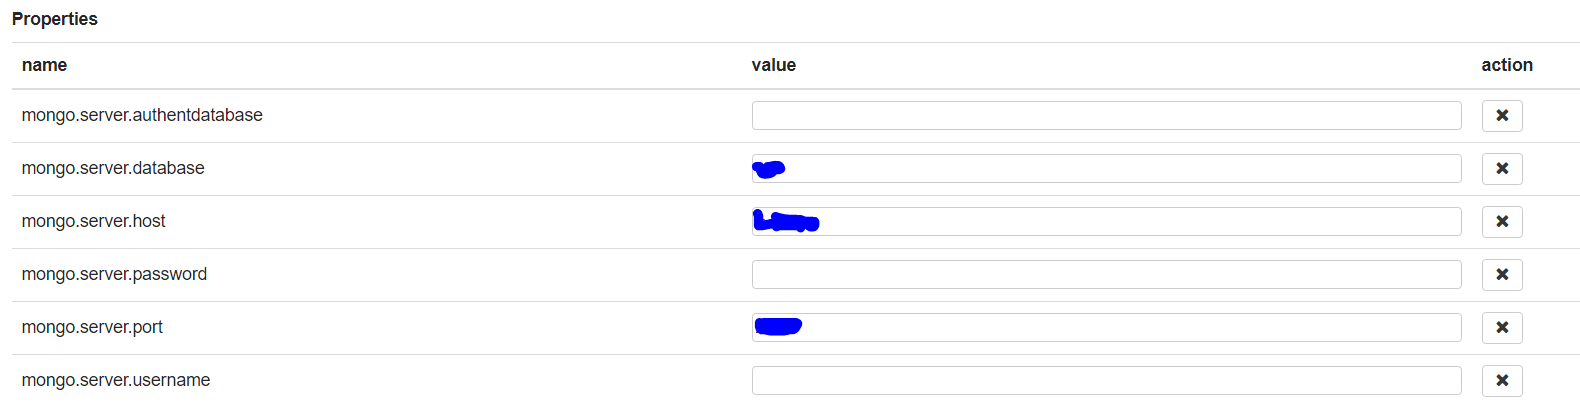
You now have a new Interpreter group called mongodb. Go to your Interpreter page, enter a friendly name like mongodb, then choose mongodb under the Interpreter group dropdown. Now, let’s enter our newly created ScaleGrid MongoDB cluster details in “Properties” found in the Cluster Details page under the Overview / Machines section. |
 |
|---|
And we’re done! Now it is time to test out our newly created interpreters.
Create a Zeppelin Note
|
To run queries that will help visualize our data, we need to create notes. From the Zeppelin header pane, click “Notebook”, and then “Create a new note”: |
 |
|---|---|
|
Make sure the notebook header shows a connected status as denoted by a green dot in the top-right corner: |
 |
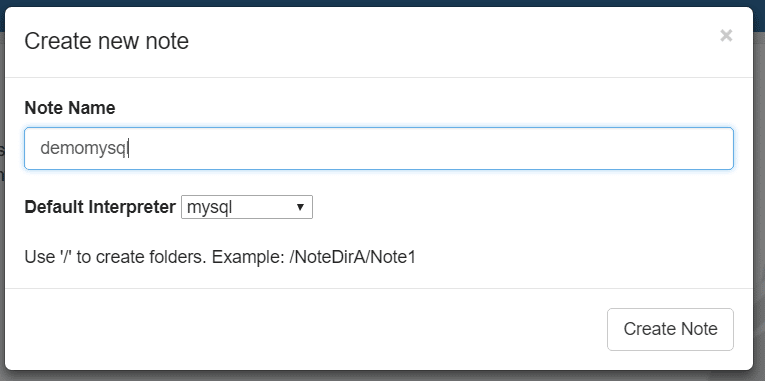
When creating a note, you’ll be presented with a dialog to enter more information. Choose the default interpreter as our newly created mysql and click “Create Note”.
Run Queries on the Note
|
Before we can run any queries, we also need to mention the type of interpreter we’ll be using for our note. We can do that by starting our note with “%mysql”. This will tell Zeppelin to expect MySQL queries in that note. |
 |
|---|
And now, we’re ready to query our database. For the purpose of this example, I’ll use my WordPress installation that contains a typical wp_options table to query and visualize its data.
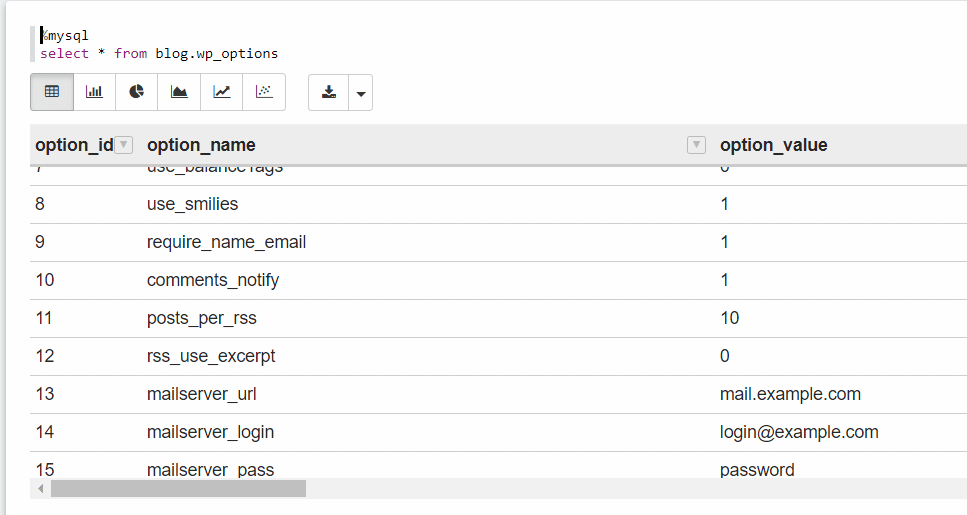
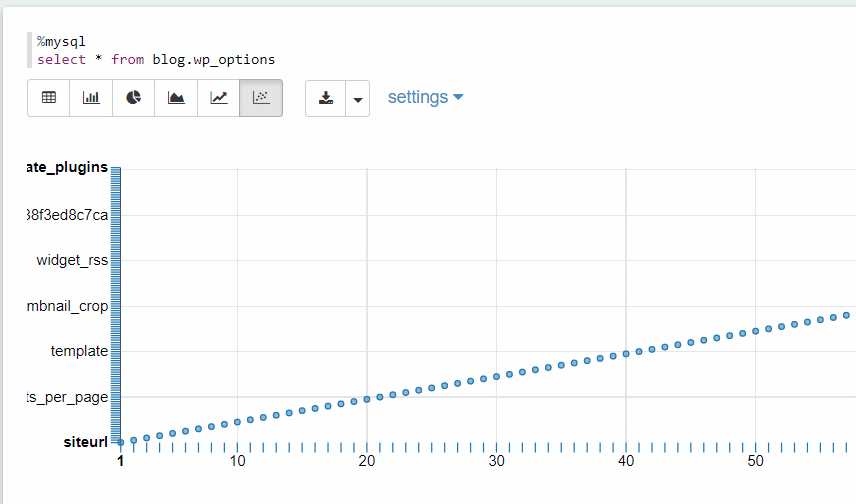
It works! You can now click on the various charts to visualize the data in different graph formats.
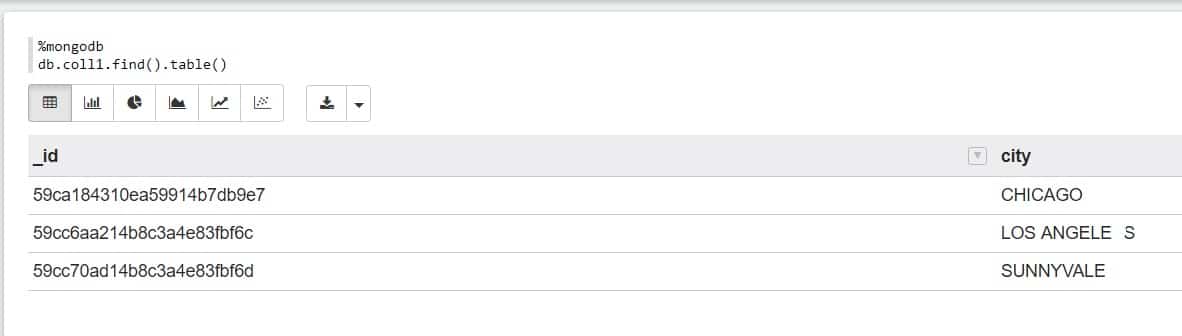
Similarly, for MongoDB, make sure you have data in the MongoDB cluster. You can add some by going to the Admin Tab and running Mongo queries.
Here’s an example of some MongoDB data in the note:
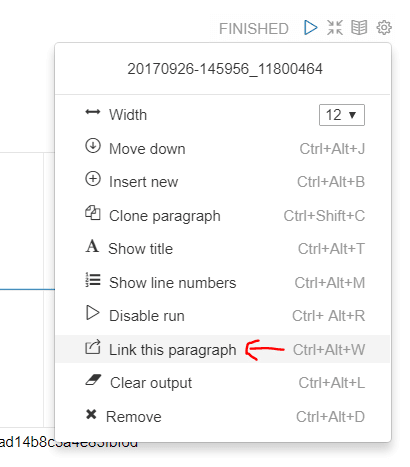
Share Links to your NotesNow that your data ready for visualization and querying, you may want to show it off to your team. You can do this very easily by creating a shareable link to the note: This shareable link will be available for anyone to view, and you can also choose to share a link to a specific graph only: |
 |
|---|

Apache Zeppelin Conclusion
Apache Zeppelin is an immensely helpful tool that allows teams to manage and analyze data with many different visualization options, tables, and shareable links for collaboration. Here are some helpful links to get you started:
You can also explore other ways to visualize your data through MongoDB GUI’s, including the top four: MongoDB Compass, Robomongo, Studio 3T and MongoBooster.
As always, if you build something awesome, do tweet us about it @scalegridio
If you need help with hosting and management for Redis™*, reach out to us at support@scalegrid.io for further information.