
MongoDB® accepts and provides access to data in the Javascript Object Notation (JSON) format, making it a perfect fit when dealing with JavaScript-based representational state transfer (REST) services. In this post, we’ll take a look at Pagination using MongoDB® and scaffold a simple Express/Mongojs application using slush-mongo. Then, we’ll use skip() and limit() to fetch the required records from a set of data.
Pagination is one of the simplest ways to increase UX when dealing with average to huge datasets.
- Split the entire data into x records per page to get (total records/x) pages.
- Next, we show a pagination with the number of pages.
- As the user clicks on the page number, we seek and fetch the set of records for that particular view only.
You can find a live demo of the app here and the complete code for this app here.
Setup the Pagination Project
Create a new folder named mongoDBPagination. Open terminal/prompt here. Next, we will install gulp, slush and slush-mongo modules. Run:
$ [sudo] npm i -g gulp slush slush-mongo
Once this is done, run:
$ slush mongo
You’ll be asked a few questions and you can answer it as follows:
[?] Which MongoDB project would you like to generate? Mongojs/Express
[?] What is the name of your app? mongoDBPagination
[?] Database Name: myDb
[?] Database Host: localhost
[?] Database User:
[?] Database Password:
[?] Database Port: 27017
[?] Will you be using heroku? (Y/n) n
This will scaffold a simple Express/Mongojs app for us. Once the installation is done, run:
$ gulp
Then, open http://localhost:3000 in your favorite browser and you should see a table with a list of routes configured in the application. This confirms that you have installed everything correctly.
Setup a Test Database
Next, we’ll create a new collection named ‘testData‘ and then populate some test data in it. Then, we’ll show this data in a paginated table. Open a new Terminal/prompt and run:
$ mongo
Then, select your database by running:
use myDb
Next, copy the snippet below and paste it into the mongo shell and hit return:
for(var i = 1; i <= 999; i++) {
    db.testData.insert({
        name: Math.random().toString(36).substring(7),
        age: Math.floor(Math.random() * 99),
        random: Math.random().toString(36).substring(7)
    });
}
This will generate 999 sample records with some random data. A sample record will look like:
{
  "_id": "5392a63c90ad2574612b953b",
  "name": "j3oasl40a4i",
  "age": 73,
  "random": "vm2pk1sv2t9"
}
This data will be paginated in our application.
Configure the Database
Since we added a new collection, we need to update our Mongojs DB config to read from ‘testData‘.
Open mongoDBPagination/config/db.js and update line 17 from:
var db = mongojs(uristring, ['posts']);
to:
var db = mongojs(uristring, ['posts', 'testData']);
Build the Pagination End Point
Now, we will build our server code by creating a REST endpoint, where the client will let us know what data it wants.
Pagination Logic
The logic for pagination is pretty simple. Our database collection consists of records and we want to retrieve and show only a few at a given instance. This is more of a UX thing to keep the page loading time to a minimum. The key parameters for any Pagination code would be:
-
Total Records
The total number of records in the DB.
-
Size
Size of each set of records that the client wants to show.
-
Page
The page for which the data needs to be fetched.
Let’s say that the client wants 10 records from the first page, it will request:
{
   page : 1,
   size : 10
}
The server will interpret this as – the client needs 10 records that starts from index 0 (page : 1).
To get the data from third page, the client would request:
{
   page : 3,
   size : 10
}
Now, the server will interpret as – the client needs 10 records that start from index 20 (page – 1 * size).
So, looking at the above pattern, we can conclude that if page value is 1, we’ll start fetching the data from record 0, and if the page value is greater than 1, we’ll start fetching data from page times size (page*size).
MongoDB Support
We now have an understanding of the pagination logic, but how do we convey the same to MongoDB?
MongoDB provides us 2 methods to achieve this
-
skip
Once the query is completed, MongoDB will move the cursor to the value of skip.
-
limit
Once MongoDB starts populating records, it will collect only the limit number of records.
Simple right? We’ll use these two methods along with find() to fetch the records.
Continue Development
Now, let’s create a new file named paginator.js inside mongoDBPagination/routes folder where we’ll configure our pagination end point. Open paginator.js and add the below code:
module.exports = function (app) {
    var db = require('../config/db');
    var api = {};

    api.testData = function (req, res) {
        var page = parseInt(req.query.page),
            size = parseInt(req.query.size),
            skip = page > 0 ? ((page - 1) * size) : 0;

        db.testData.find(null, null, {
            skip: skip,
            limit: size
        }, function (err, data) {
            if(err) {
                res.json(500, err);
            }
            else {
                res.json({
                    data: data
                });
            }
        });
    };

    app.get('/api/testData', api.testData);
};
- Line 6-7: We get the page number and page size from the request params.
- Line 8: We configure the skip value.
- Line 10: We query the DB using the find method, passing null as the first 2 arguments to satisfy the method signature of find().
In the third argument of the find method, we’ll pass the filter criterion, and once the results come back, we respond with a JSON.
To test this, make sure your server is running and navigate to:
http://localhost:3000/api/testdata?page=1&amp;size=2
You should see the first two records in the collection, and you can alter the values of page and size to see different results.
Build the Client
We’ll now build the client that will implement the pagination using Bootstrap tables to show the data and bootpag plugin to handle the pager.
First, we will install Bootstrap. Run:
$ bower install bootstrap
Next, we will download jquery.bootpag.min.js from here to public/js folder. Update views/index.html as:
<!DOCTYPE html>
<html>
<head>
    <title><%= siteName %></title>
    <link rel="stylesheet" href="/css/style.css">
    <link rel="stylesheet" href="/bower_components/bootstrap/dist/css/bootstrap.min.css">
</head>
<body>
    <div class="navbar navbar-inverse navbar-fixed-top" role="navigation">
        <div class="container">
            <div class="navbar-header">
                <a class="navbar-brand" href="javascript:"><%= siteName %></a>
            </div>
        </div>
    </div>
    <div class="container">
        <h1>My Data</h1>
        <table class="table">
            <thead>
                <tr>
                    <th>_id</th>
                    <th>Name</th>
                    <th>Age</th>
                    <th>Random</th>
                </tr>
            </thead>
            <tbody>
                <!-- we will populate this dynamically -->
            </tbody>
        </table>
        <div id="pager" class="text-center"></div>
        <input type="hidden" value="<%= totalRecords %>" id="totalRecords">
        <input type="hidden" value="<%= size %>" id="size">
    </div>
    <script type="text/javascript" src="bower_components/jquery/dist/jquery.min.js"></script>
    <script type="text/javascript" src="/js/jquery.bootpag.min.js"></script>
    <script type="text/javascript" src="/js/script.js"></script>
</body>
</html>
And finally, we’ll write the logic to populate the table. Open js/script.js and fill it as:
// init bootpag
$('#pager').bootpag({
    total: Math.ceil($("#totalRecords").val() / $("#size").val()),
    page: 1,
    maxVisible: 10,
    href: "#page-{{number}}"
}).on("page", function (event, num) {
    populateTable(num);
});

var template = '<tr><td>_id</td><td>name</td><td>age</td><td>random</td>';

var populateTable = function (page) {
    var html = '';
    $.getJSON('/api/testdata?page=' + page + '&size=' + $("#size").val(), function (data) {
        data = data.data;
        for (var i = 0; i < data.length; i++) {
            var d = data[i];
            html += template.replace('_id', d._id)
                .replace('name', d.name)
                .replace('age', d.age)
                .replace('random', d.random);
        };
        $('table tbody').html(html);
    });
};

// load the first page data
populateTable(1);
Now, navigate to:
http://localhost:3000
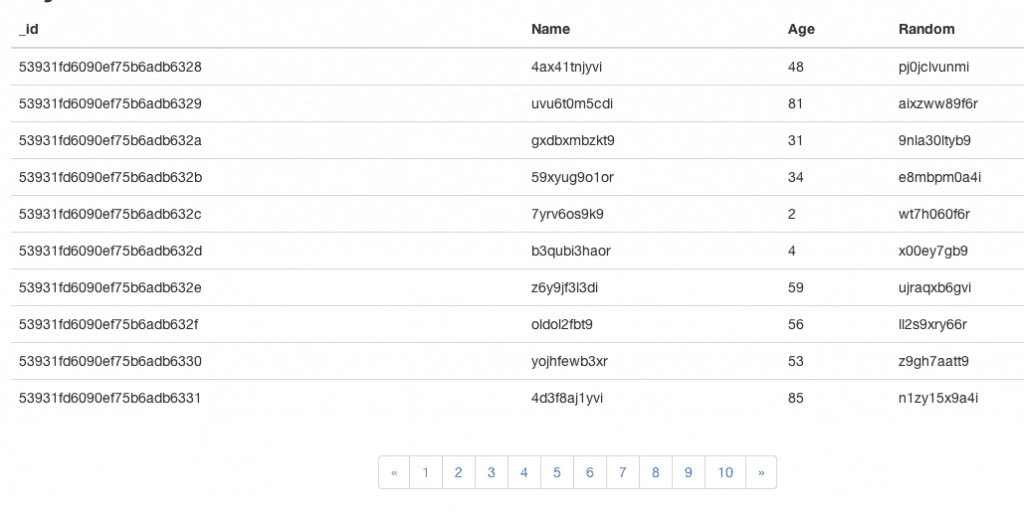
You should now see the table and the pager component. You can click through the page numbers to browse through the data.
Simple and easy! Hope you got an idea on how to implement pagination using MongoDB.
You can find the code for this app here.
For more details on the performance on the paging operation refer to our other blog post – Fast Paging with MongoDB